


We decided to get started on our garden boxes a few weekends ago because it looked like we were gonna be home for a while.
We’ve had gardens in the past….and have learned a thing of two in the process. We are not experts by any means!!!! There is a lot to learn so we are just taking baby steps. Feel free to follow along on my instagram account www.instagram.com/corryfrazieressentials.
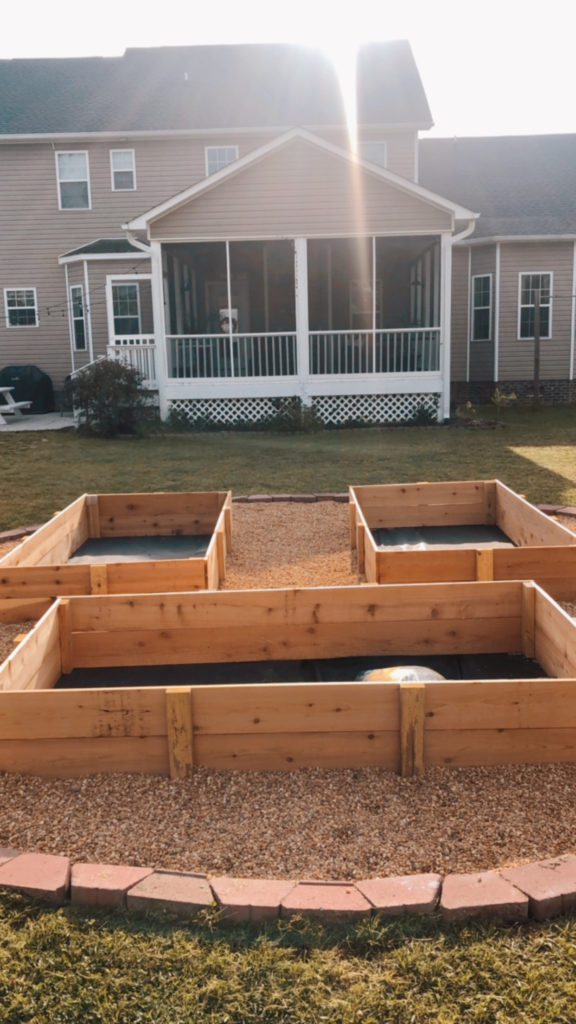
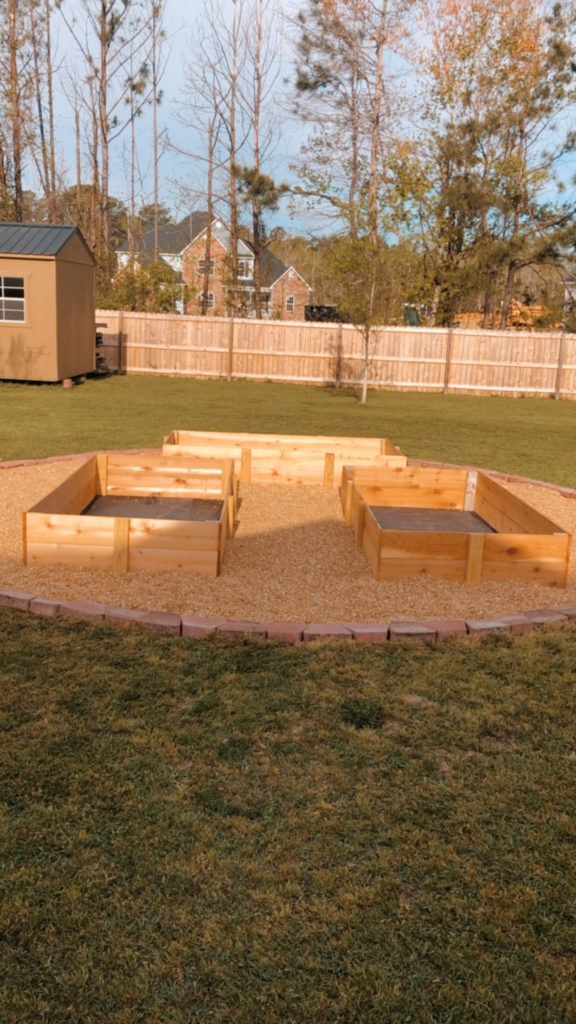
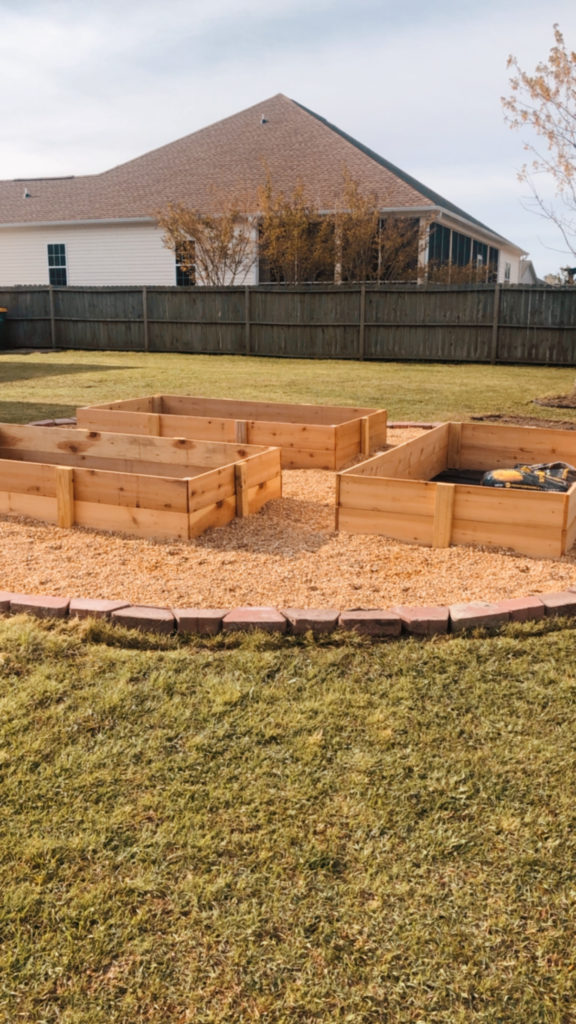
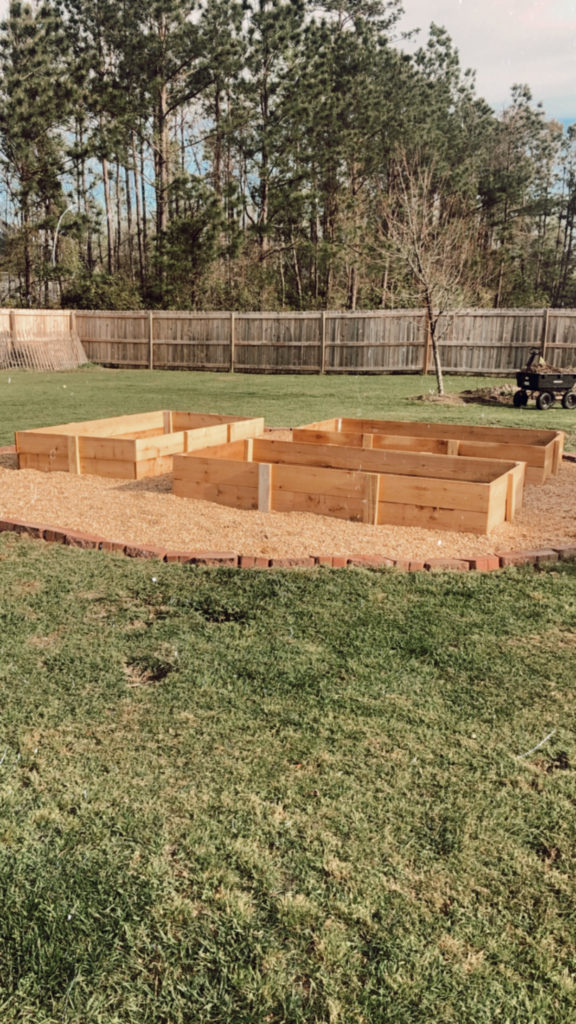
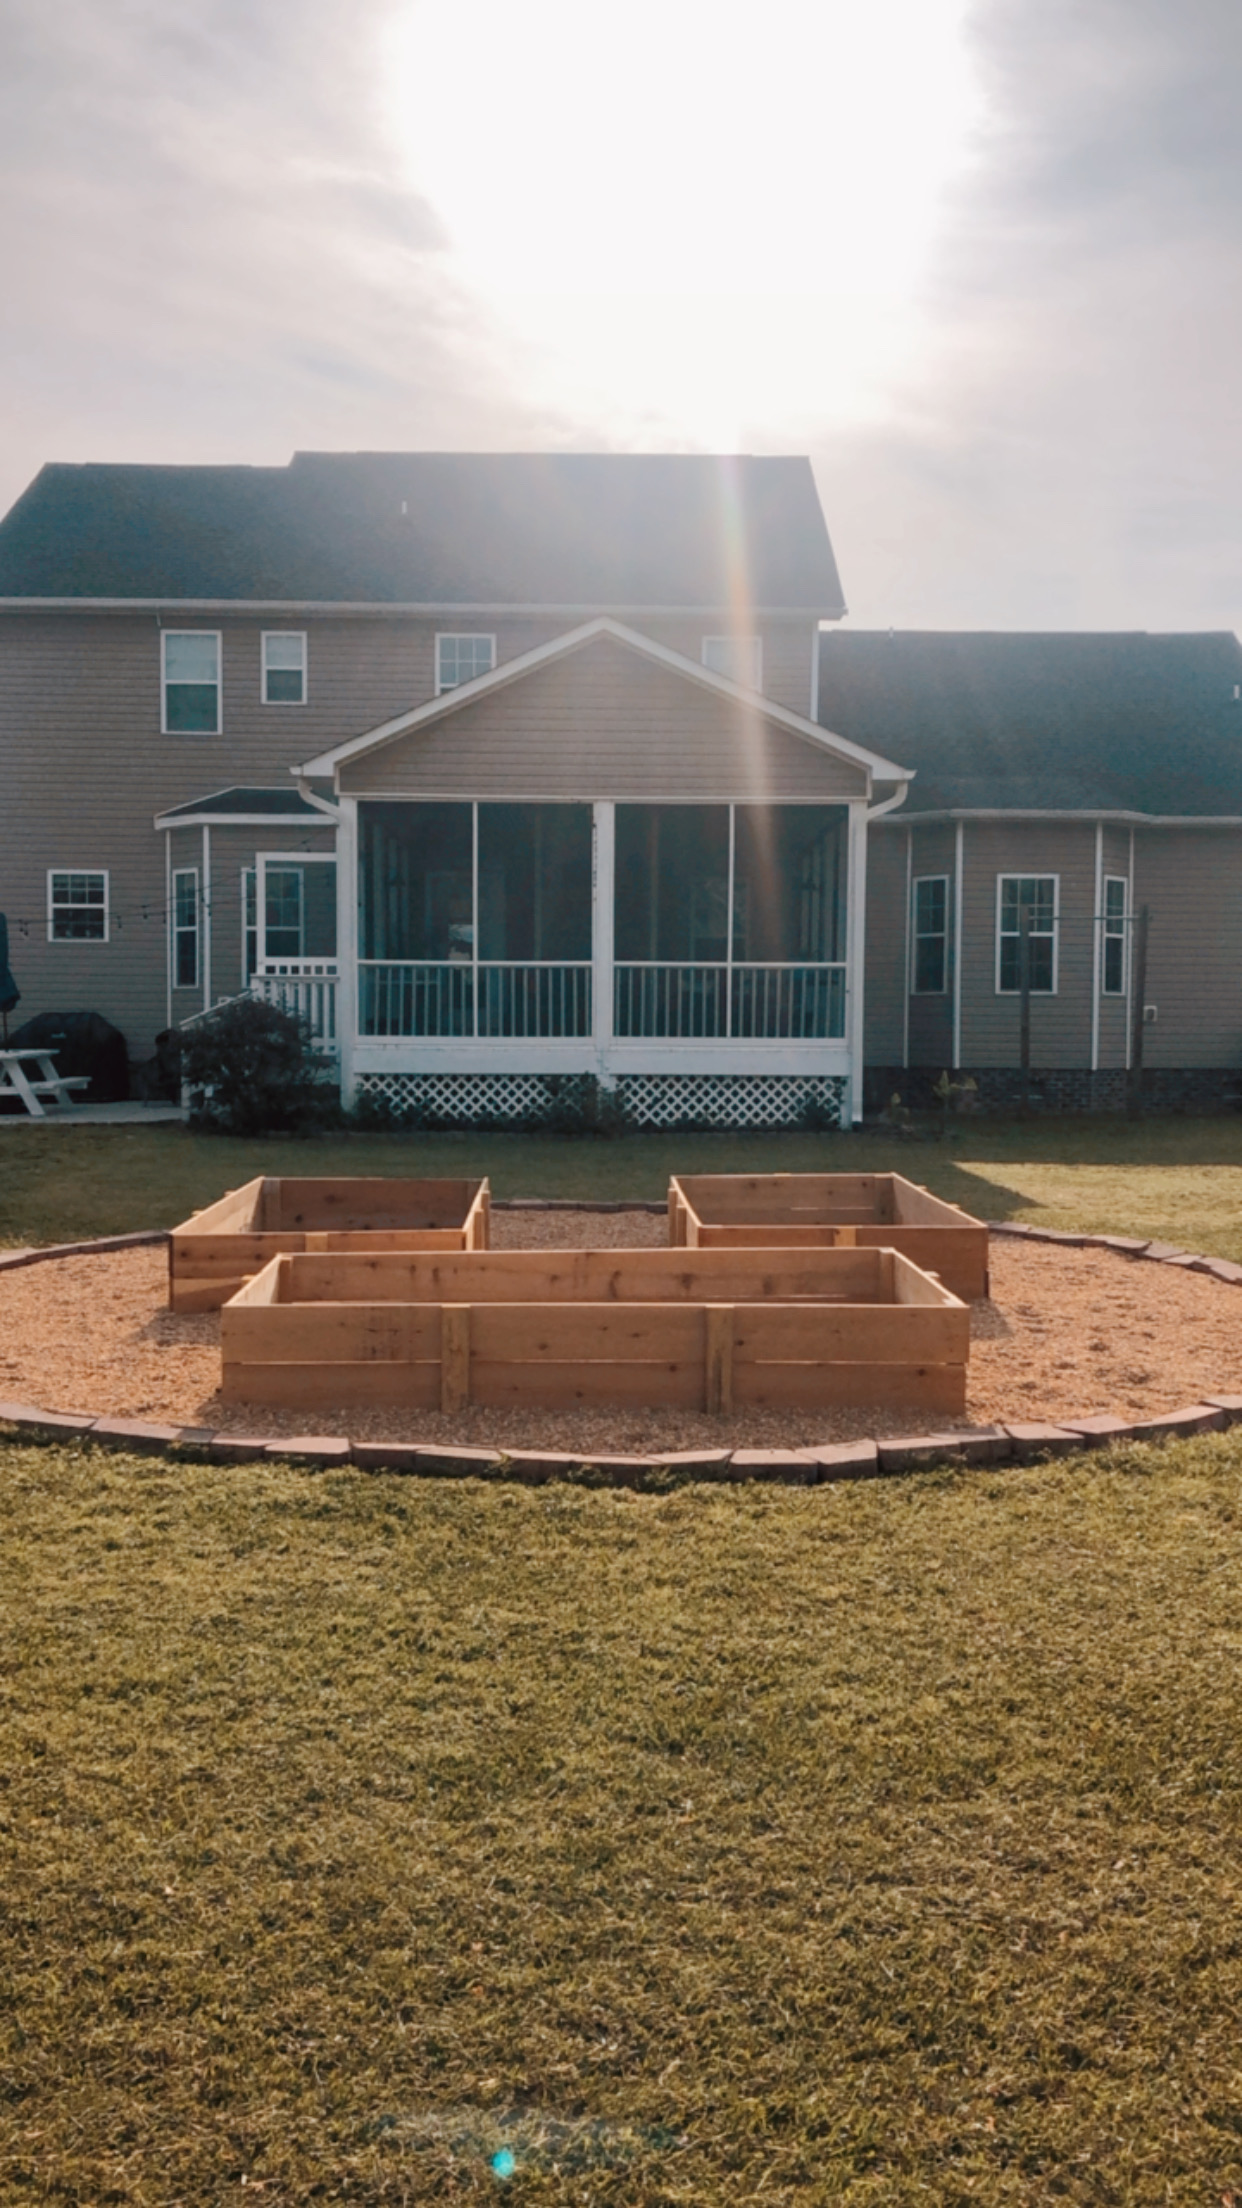
So we had a pool in the backyard for the last two summers and the girls decided that since we have a boat now, the pool was not something we wanted to spend a lot of time cleaning and using this summer. We all worked together to take the pool apart and give away parts of it. Then we were left with this big area of dead grass that already had a border around it in the middle of our yard. We know that gardens need a lot of sun…so BINGO…perfect spot!!!
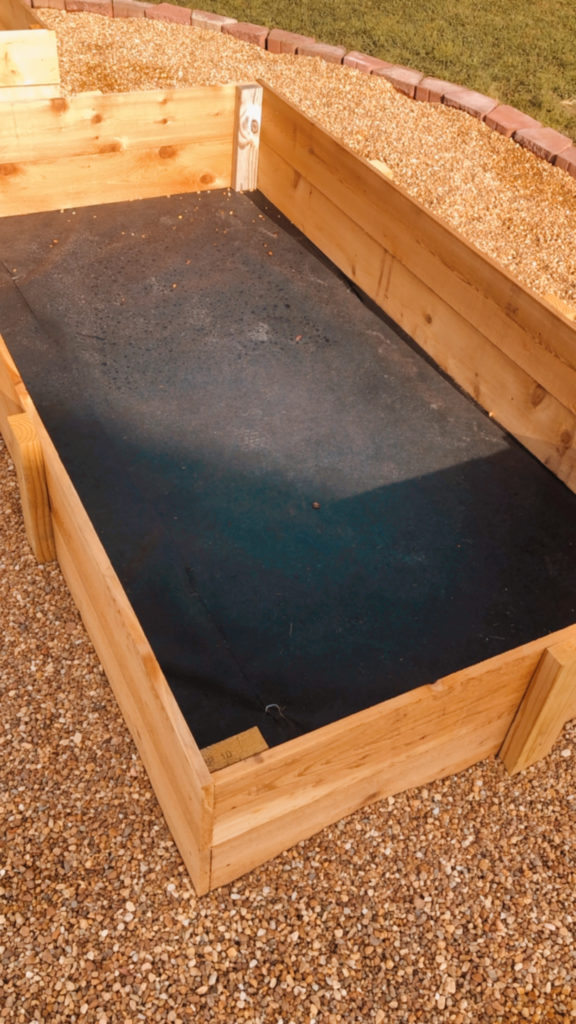
We put down the weed barrier. Then put the brick pavers back in place and Kevin and Maddie began building the garden boxes.
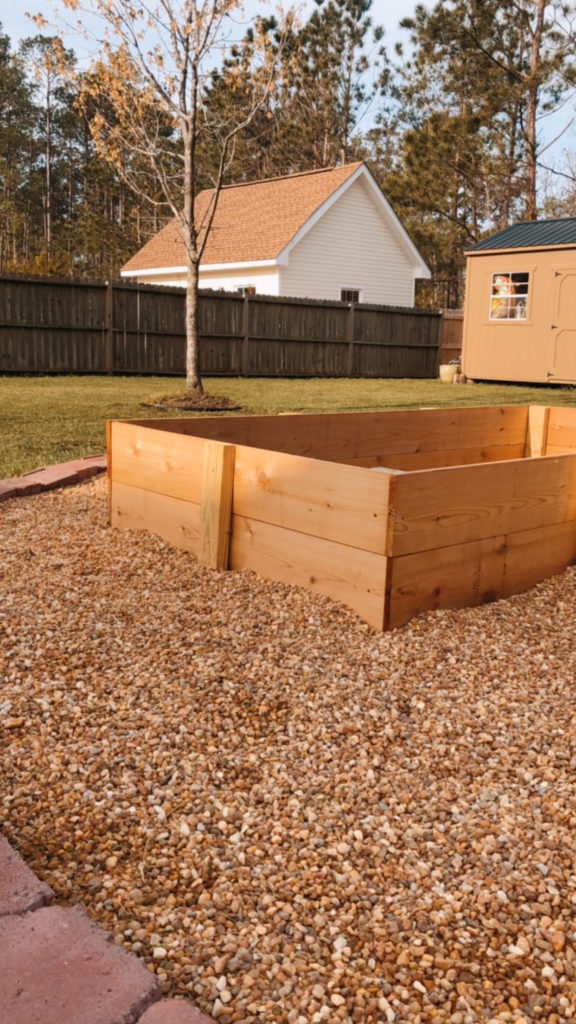
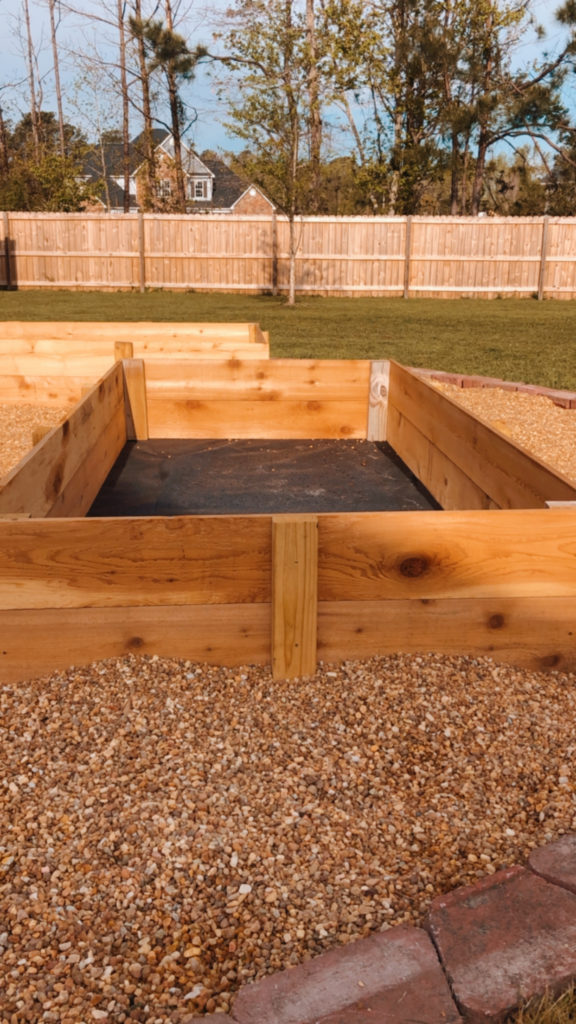
We used Cedar boards to prevent rot and because they were untreated. We made our boxes 4ftx8ft because honestly it was the easiest way to do as little cutting as possible. 🙂
Kevin bought:
18- 1x8x8’cedar boards (he cut 6 in half to be used as the 4′ ends for each box)
Then he used scraps from another project ( I think they are 2×4 maybe) to be the corner and side vertical pieces. And he cut those to be 16 inches high. That’s how he held the boards that were stacked on top of one another together. We decided to put the small vertical pieces on the outside just for aesthetic purposes…to add a little character. You could put them on the inside instead if you wanted to.
He then cut 6 boards in half to be used as the 4′ ends of the each box.
Kevin and Maddie laid out all the boxes as they cut them to make sure there were no mistakes. It looked like a yard full of large puzzle pieces. 🙂
He stacked two 8′ boards on top of one another to make the sides and two 4′ board on top of one another to make the ends.
He screwed them together with wood screws.
Once we got out three boxes in place, we filled the area in with pea gravel. We could have gotten bags of gravel at our local Lowe’s store…but Kevin likes to go get a half scoop or full scoop in the bed of his truck from the local landscaping store instead for big projects like this. We will fill in the boxes with organic soil, organic compost, and a dusting of mulch after the plants are in to help them retain moisture and help keep the weeds out.
Let me know what your garden boxes look like!!! Happy planting!!

Our DIY Cedar Garden Boxes
Charlotte Staton, Charlotte Staton Design
"A personal branding photoshoot with Corry was the best decision I have ever made for my growing business."


Julia Sampsel, The Simplified House
"The images from my branding shoot turned out beautifully and have made building my website and online presence so much easier."
Linda St. Amant, Sprinkled Designs
"To anyone thinking of booking with Corry, don't think twice! She truly understands how to make your business shine via photography."
Kimberly Turner, Frosted Cakery
"I knew having professional photos for my business was important, but I didn’t know how huge the impact would actually be! Highly recommend!"
Christy Grifaldo, Grifaldo Properties
"You can't help but smile and laugh the whole time you're shooting with Corry, making it so easy to work with her."
")
")
